
Risk Level: Low
Description:
This plugin guarantees that the monitoring agent is automatically provisioned. The Microsoft Monitoring Agent monitors and warns on numerous security-related configurations and events, such as system upgrades, OS vulnerabilities, and endpoint protection.
About the Service :
Amazon RDS (Amazon Relational Database Service) makes it simple to set up, run, and scale a relational database in the cloud. It offers scalable capacity at a low cost while automating time-consuming administrative activities including hardware provisioning, database setup, patching, and backups.
Impact:
When the Automatic Provisioning of the monitoring agent is disabled, the Azure Security Center is not able to install Microsoft Monitoring Agent on the existing supported virtual machines. If the MMA is not installed, the Azure Security Center will not be able to log events, read security misconfiguration, or send the collected data to your workspace.
Steps to reproduce :
- Sign in to your Azure management console.
- Navigate to the Azure Security Center blade at: https://portal.azure.com/#blade/Microsoft_Azure_Security/SecurityMenuBlade/
- On the Microsoft Defender For Cloud page that appears click on the Azure Subscriptions heading.
- Select the subscription that you want to examine.
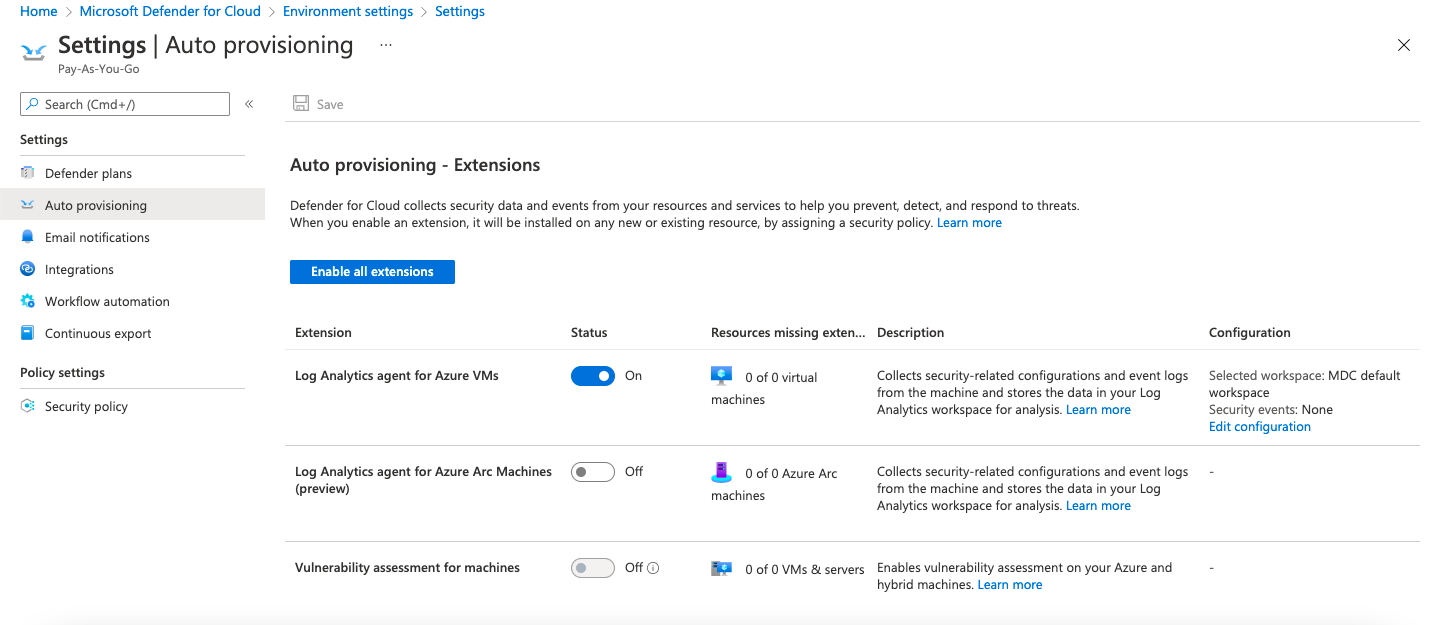
- Under the navigation panel, select Auto provisioning.
- On the Auto provisioning - Extensions page that appears, check if all the auto provisioning extensions are enabled for the selected Microsoft Azure subscription.
- If not, then the auto provisioning of the monitoring agent feature is disabled for the selected Azure subscription.
- Repeat step no. 3 - 8 for each Microsoft Azure subscription available in your account.
Steps for remediation :
- Sign in to your Azure management console.
- Navigate to the Azure Security Center blade at: https://portal.azure.com/#blade/Microsoft_Azure_Security/SecurityMenuBlade/
- On the Microsoft Defender For Cloud page that appears click on the Azure Subscriptions heading.
- Select the subscription that you want to examine.
- Under the navigation panel, select Auto provisioning.
- On the Auto provisioning - Extensions page that appears, click on Enable all extensions.
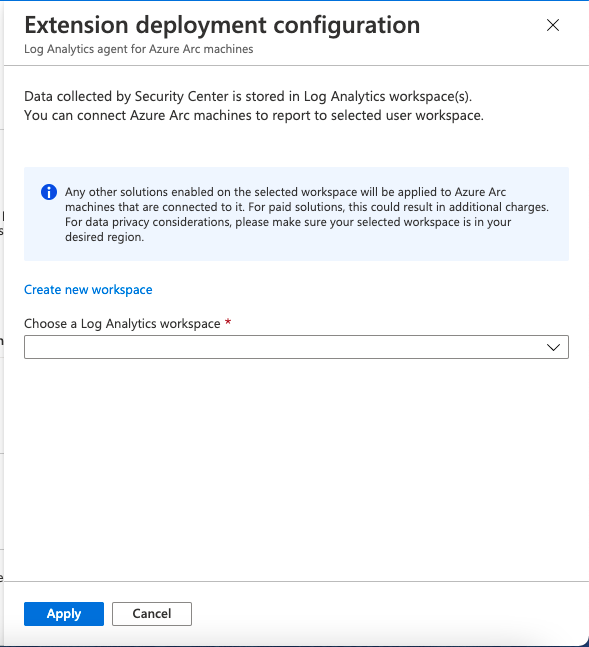
- Select a workspace from the Choose a Log Analytics Workspace dropdown and click on Apply.
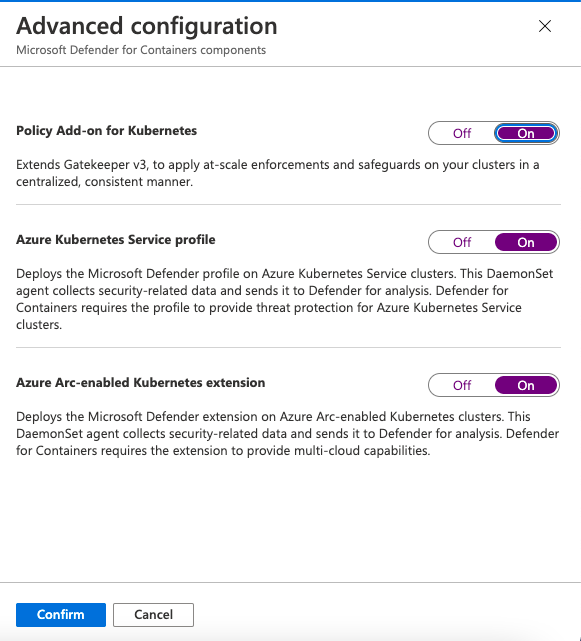
- On the Advanced Configuration pane that appears, click on Confirm.
- The Auto provisioning of the monitoring agent is enabled on your selected Azure subscription.
- If required, repeat steps for other Microsoft Azure cloud subscriptions available.
References:
- https://docs.microsoft.com/en-us/azure/security-center/security-center-provide-security-contact-details
- https://azure.microsoft.com/mediahandler/files/resourcefiles/cis-microsoft-azure-foundations-security-benchmark/CIS_Microsoft_Azure_Foundations_Benchmark_v1.0.0.pdf
Please feel free to reach out to support@pingsafe.ai with any questions that you may have.
Thanks
PingSafe Support