
Ensures that automatic instance repairs is enabled for all virtual machine scale sets.
Risk Level: Medium
Description
This plugin ensures that the Azure Virtual Machine (VM) scale sets have the automated instance repair feature enabled. This functionality aids in ensuring high application availability by maintaining a healthy set of instances. If an instance is deemed to be unhealthy, it will be repaired automatically by destroying the unhealthy instance and generating a new one to replace the old one.
About the Service
Azure Virtual Machines:
Azure Virtual Machines (VM) are one of several forms of scalable, on-demand computing resources offered by Azure. VMs are typically used when you require more control over the computing environment than the other options provide. To know more, read here.
Impact
If the automatic instance repair option for your VM scale sets is disabled, Azure will not perform periodic health checks to automatically repair damaged instances, leaving unhealthy VM instances unattended. This will eventually reduce overall efficiency since services that rely on the damaged scale sets will be affected.
Steps to Reproduce
Using Azure Console-
- Log In to your Azure Console.
- Navigate to the Home portal of the Azure Console and click on All services.
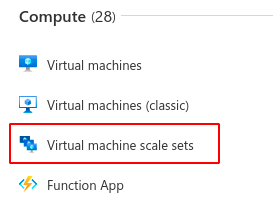
- Select Virtual machine scale sets under Compute to access all the virtual machine scale sets present in the directory. You can use this link here to navigate directly if you’re already logged in.
- In the list of Virtual Machine (VM) scale sets displayed, select a scale set you wish to investigate.
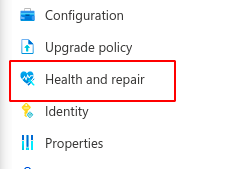
- From the navigation panel on the left side of the console, go to Health and repair in the Settings section.
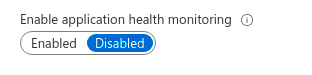
- If the Health monitoring is set to disabled or if it is enabled but automatic repairs is set to Off, then the Automatic repairs feature is not enabled for the selected Azure virtual machine scale set.
(or)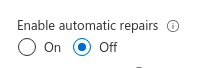
- Repeat steps 4 to 6 for all the scale sets you want to investigate in the selected directory.
- If you have multiple directories, repeat steps 2 to 7 for each directory in your Azure Console.
Steps for Remediation
Determine whether or not you truly require the automatic repairs feature to be disabled. If not, make the necessary changes to enable it using the steps below.
Using GCP Console-
- Log In to your Azure Console.
- Navigate to the Home portal of the Azure Console and click on All services.
- Select Virtual machine scale sets under Compute to access all the virtual machine scale sets present in the directory. You can use this link here to navigate directly if you’re already logged in.
- From the list of scale sets, choose the VM scale set you want to reconfigure. (In case you aren’t sure which one needs to be configured, follow the steps to reproduce listed above to determine which scale set to choose.)
- From the navigation panel on the left side of the console, go to Health and repair in the Settings section.
- Click on Enabled for the Enable application health monitoring option, if not enabled already.
- Click on the On radio button for the Enable automatic repairs option to enable this feature. In the Grace period (min) text-box provided, enter the period of time you want automatic repairs to be suspended due to a VM state change.

- Repeat steps 3 to 7 for all the VM scale sets you want to reconfigure in the selected directory.
- If you have multiple directories, repeat steps 2 to 8 for each directory in your Azure Console.
Please feel free to reach out to support@pingsafe.ai with any questions that you may have.
Thanks
PingSafe Support