
Ensure that automatic node upgrades are enabled on all node pools in Kubernetes clusters
Risk Level: Medium
Description
This plugin ensures that all Kubernetes cluster nodes have automatic upgrades enabled. The automatic upgrade feature helps in keeping all the nodes in your Kubernetes cluster up-to-date with the latest versions. It also has various additional advantages, such as lower management overhead, better security, and ease of use.
About the Service
Google Cloud Kubernetes Engine:
The Google Cloud Kubernetes Engine is a Kubernetes-based service that includes a control plane, nodes that house pods, and Google Cloud services. It aids in the modernization of your programs by offering a platform for deploying, managing, and scaling containerized applications. The Google Cloud Console or kubectl can be used to interact with this Google Cloud Kubernetes Engine. To know more, read here.
Impact
If you disable the automatic node-upgrades option for your cluster's nodes, the nodes will not be upgraded automatically whenever a new version is released. This would require you to manually track and upgrade all of the nodes in your cluster on a regular basis. Because new upgrades frequently fix security issues, disabling this function will also prevent your nodes from receiving security updates automatically.
Steps to Reproduce
Using GCP Console-
- Log In to your GCP Console.
- From the top navigation bar, select the GCP project you want to investigate.

- From the navigation panel on the left side of the console, go to Kubernetes Engine and select Clusters. You can use this link here to navigate directly if you’re already logged in.
- Select the cluster you want to investigate from the list of clusters displayed and go to the NODES tab of the selected cluster.
- Under the Node pools section, select the node pool you want to verify from the list of node pools displayed in the table.
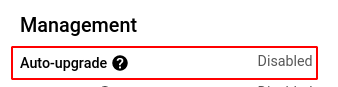
- In the Management section, check the status of Auto-upgrade. If it says disabled then the automatic node upgrade feature is disabled for this particular node pool of the selected cluster.
- Repeat steps 5 and 6 for all the node pools present in the selected cluster.
- Repeat steps 4 to 7 for all the clusters you want to investigate in the selected project.
- If you have multiple projects that you want to investigate, repeat steps 2-8 for each project in your GCP console.
Steps for Remediation
Determine whether or not you truly require the automatic node upgrade feature to be disabled. If not, make the necessary changes to enable it using the steps given below.
Using GCP Console-
- Log In to your GCP Console.
- From the top navigation bar, select the GCP project you want to investigate.
- From the navigation panel on the left side of the console, go to Kubernetes Engine and select Clusters. You can use this link here to navigate directly if you’re already logged in.
- Select the cluster you want to reconfigure from the list of clusters displayed and go to the NODES tab of the selected cluster. (In case you aren’t sure which node pool needs to be configured, follow the steps to reproduce listed above to determine which to choose.)
- Under the Node pools section, select the node pool you want to verify from the list of node pools displayed in the table.
- Click the EDIT button on the top navigation bar to reconfigure the settings.

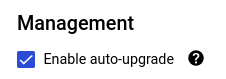
- In the Management section, check the Enable auto-upgrade checkbox to enable automatic node upgrade.
- Click save to save the changes to the node pool.
- Repeat steps 5 and 6 for all the node pools that you want to reconfigure in the selected cluster.
- Repeat steps 4 to 7 for all the clusters you want to reconfigure in the selected project.
- If you have multiple projects, repeat steps 2-10 for each project in your GCP console.