
RISK LEVEL
High
DESCRIPTION
This plugin of GCP Identity and Access Management (IAM) ensures that user-managed service accounts do not have any admin, owner, or write privileges. Service accounts are primarily used for API access to Google. It is also recommended to not use admin access for service accounts. This guarantees that admin privileges are within safe hands so as to not to misuse them.
ABOUT THE SERVICE
Google Cloud IAM:
IAM, which is an acronym for Identity and Access Management, is the Google Cloud policy. This policy is responsible for specifying access controls for Google Cloud resources. Basically, IAM allows heads to approve who can make a move on explicit assets, giving you full control and permeability to oversee Google Cloud assets halfway. For undertakings with complex hierarchical designs, many workgroups, and many activities, IAM gives a bound together view into security strategy across your whole association, with worked in evaluating to ease consistency processes. For more information, click here.
IMPACT
When an IAM account is created, you ought to guarantee that your Google Cloud Service Accounts managed by user(s), are not utilizing admin privileges, to carry out the rule of least advantage and forestall any incidental or deliberate adjustments that might prompt information to spill out which is professionally & ethically unhealthy. This may eventually lead to the loss of data or leakage of confidential information in some cases. A user-managed service account is used by a virtual machine or an application to run API demands for your benefit. Google Cloud Platform service accounts have admin privileges that enable to create, alter or erase assets provided that you award the essential IAM consents, at the task or asset level. In order to enhance such vulnerability service account, the admin access plugin helps to limit the usage and administrative controls.
STEPS TO REPRODUCE
Using GCP Console-
Ensure that your GCP service account managed by the user has administrative privileges or not, just by following the given simple steps:
- Firstly, use the administrator account for signing up to Google Cloud Platform Console.
- Now, from the top navigation bar, select the GCP Project you want to investigate in.

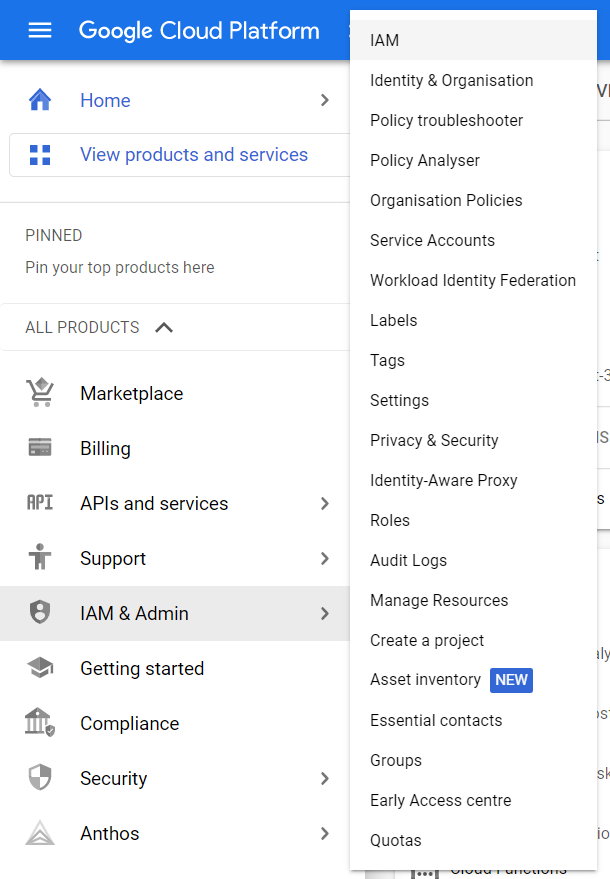
- From the Navigation Menu on the left, you may find IAM & Admin section under All Products Section, click on it.

- Under IAM & Admin section, click on the IAM button. Thence, a new IAM Page will appear.
- After selecting the IAM button, click on the Permissions Tab available on the IAM Page.
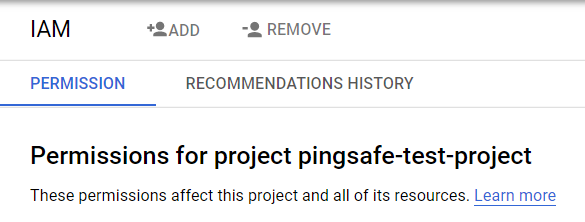
- Under Peermissions tab, there is an option available as VIEW BY, click on the ROLES or MEMBERS. This will list all the available and working members or the accounts available for your selected GCP Project.

- Under the VIEW BY section you will find a Filter option, click on it and enter the serviceAccount Property. This will list all theservice accounts under your working project.

- Now, you can select the service account you want to examine. The format of a user-managed service account is like, <service-account-name>@<project-id>.iam.gserviceaccount.com
For example, pingsafe-test-project-xxxxxx@appspot.gserviceaccount.com - Now, check the Role Column, here you will find the roles assigned to respective service accounts including Editor, *Admin, *admin, or Owner. All the accounts with these roles have admin privileges.
- This way you can check out the user-managed service accounts having admin privileges.
- Repeat the steps mentioned above for reviewing accounts in other folders/projects associated with other GCP organizations deployed within your record.
STEPS FOR REMEDIATION
Using GCP Console-
In order to remove the admin privileges like read, write, and edit options from the user-managed service accounts, follow the below-mentioned steps:
- Before, proceeding to the steps of remediation you must ensure the steps to reproduce. This is essential as after making changes to the roles of service accounts there will be a change in the functionality of accounts associated with your project. After verification step ahead.
- Firstly, use the administrator account for signing up to Google Cloud Platform Console.
- Now, from the top navigation bar, select the GCP Project you want to investigate in.
- From the Navigation Menu on the left, you may find IAM & Admin section under All Products Section, click on it.
- Under IAM & Admin section, click on the IAM button. Thence, a new IAM Page will appear.
- After selecting the IAM button, click on the Permissions Tab available on the IAM Page.
- Under Peermissions tab, there is an option available as VIEW BY, click on the ROLES or MEMBERS. This will list all the available and working members or the accounts available for your selected GCP Project.
- Under the VIEW BY section you will find a Filter option, click on it and enter the serviceAccount Property. This will list all theservice accounts under your working project.
- Now, you can select the service account you want to examine. The format of a user-managed service account is like, <service-account-name>@<project-id>.iam.gserviceaccount.com
For example, pingsafe-test-project-xxxxxx@appspot.gserviceaccount.com - Now, check the Role Column, here you will find the roles assigned to respective service accounts including Editor, *Admin, *admin, or Owner. All the accounts with these roles have admin privileges.
- You may now click on the little pencil (edit) button available infront of the service account name. On the editing permissions panel you may perform instructions accordingly.
- Pick the overseer job (for example *Admin, *admin, Editor or Owner) that you need to eliminate from the chose administration account, then, at that point, click on the erase symbol to eliminate it.
- In order to relegate another job that will offer the support account the insignificant measure of access needed to play out its assignments, click ADD ANOTHER ROLE and select the necessary job from the Select a job dropdown list.
- Now, Click on the SAVE button to save your done changes.
- You may repeat the above steps for other GCP Projects under your organization.