
Ensure that all node pools in GKE clusters have the desired encryption level.
Risk Level: Medium
Description
This plugin ensures that GKE cluster nodes are encrypted using desired encryption protection level. CMEK gives you more control over the key operations compared to the Google-managed encryption keys. These keys can be created by the users using the Google Cloud Key Management Service.
About the Service
Google Cloud Kubernetes Engine:
The Google Cloud Kubernetes Engine is a Kubernetes-based service that includes a control plane, nodes that house pods, and Google Cloud services. It aids in the modernization of your programmes by offering a platform for deploying, managing, and scaling containerized applications. The Google Cloud Console or kubectl can be used to interact with this Google Cloud Kubernetes Engine. To know more, read here.
Impact
Google-Managed Encryption Keys is the default encryption provided whenever a new node is created. However, GMEKs offer very little flexibility and make everything is transparent to the client. CMEKs, on the other hand, allow the user to tailor the encryption to their specific requirements, resulting in greater security.
Steps to Reproduce
Using GCP Console-
- Log In to your GCP Console.
- From the top navigation bar, select the GCP project you want to investigate.

- From the navigation panel on the left side of the console, go to Kubernetes Engine and select Clusters. You can use this link here to navigate directly if you’re already logged in.
- Select the cluster you want to investigate from the list of clusters displayed and go to the NODES tab of the selected cluster.
- Under the Node pools section, select the node pool you want to verify from the list of node pools displayed in the table.
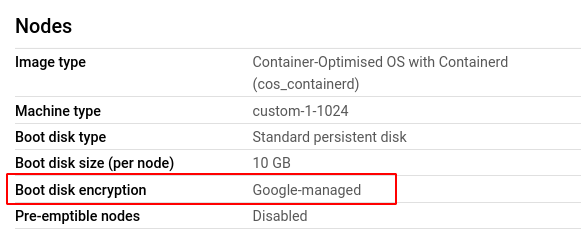
- In the Nodes section, check the value of Boot disk encryption. If it is Google-managed then the node encryption is not on desired protection level.
- Repeat steps 5 and 6 for all the node pools present in the selected cluster.
- Repeat steps 4 to 7 for all the clusters you want to investigate in the selected project.
- If you have multiple projects that you want to investigate, repeat steps 2-8 for each project in your GCP console.
Steps for Remediation
Determine whether or not you truly require the current protection level for your node pool. If not, make the necessary changes to ensure that your node pools have a desired encryption level.
NOTE: The encryption level for node pools cannot be changed once the node pool is made. Hence, to enable it, we must re-create the node pool.
Using GCP Console-
- Log In to your GCP Console.
- From the top navigation bar, select the GCP project you want to investigate.

- From the navigation panel on the left side of the console, go to Kubernetes Engine and select Clusters. You can use this link here to navigate directly if you’re already logged in.
- Select the cluster you want to reconfigure from the list of clusters displayed and go to the NODES tab of the selected cluster. (In case you aren’t sure which node pool needs to be configured, follow the steps to reproduce listed above to determine which to choose.)
- Under the Node pools section, select the node pool you want to verify from the list of node pools displayed in the table and note down all the configuration details.
- Go back to the configuration page of the selected cluster and click on the ADD NODE POOL button.

- Enter and configure the desired details according to the configuration settings of the node pool you are re-creating.
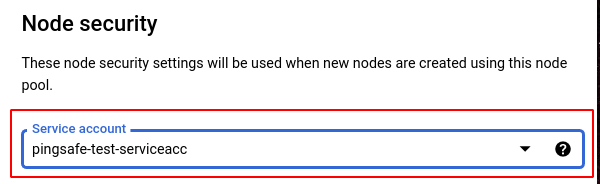
- In the Security tab, change the service account to your desired account from the drop-down list provided.
- Click CREATE to create the new node pool.
- You can now delete the original node pool to avoid unwanted expenses. Click on the node pool and select the DELETE button from the top navigation bar and press DELETE in the pop up box to confirm the deletion.

- Repeat steps 5 to 10 for all the node pools that you want to reconfigure in the selected cluster.
- Repeat steps 4 to 11 for all the clusters you want to reconfigure in the selected project.
- If you have multiple projects, repeat steps 2-12 for each project in your GCP console.