
This plugin guarantees that the root account is not active.
Risk Level: High
Description:
This plugin guarantees that the root account is not active. The root account should not be used for the maintenance of daily accounts. Instead, the IAM users should be utilized, roles, and groups.
PingSafe strongly recommends creating IAM users with appropriate group-level permissions for account access. Create an MFA token for the root account, and store its password and token generation QR codes in a secure place.
Note:
AWS updates the Credential Report every 4 hours, it'll get updated soon please check back later. https://docs.aws.amazon.com/IAM/latest/UserGuide/id_credentials_getting-report.html
Configuration Parameters
Root Account in Use Days: The enforcement to not to use AWS root account when it comes to keeping your AWS account safe and secure. The parameter holds the number of days Root Account has been used. When the value surpasses the desired limit an issue is generated. By default, the value is 2 days.
About the Service :
AWS ID and Access Management (IAM) allows you to securely manage access to AWS services and resources. With IAM, AWS users and groups can be established and managed and permissions used to enable access by AWS resources and prohibit them.
We can discover and adjust the rules so that only the services are accessible. We can thus adhere better to the less privileged principle.
Impact :
It is essential to lock the use of root account in order to keep the AWS account secure, since anyone who has root credentials has free access to all the resources and services within the AWS environment, including billing information and root password modification. In order to avoid root-account usage, it is recommended to use the least privilege principle by creating AWS IAM users with minimum measures required to do the required job.
Steps to reproduce :
- Sign-in to AWS management console.
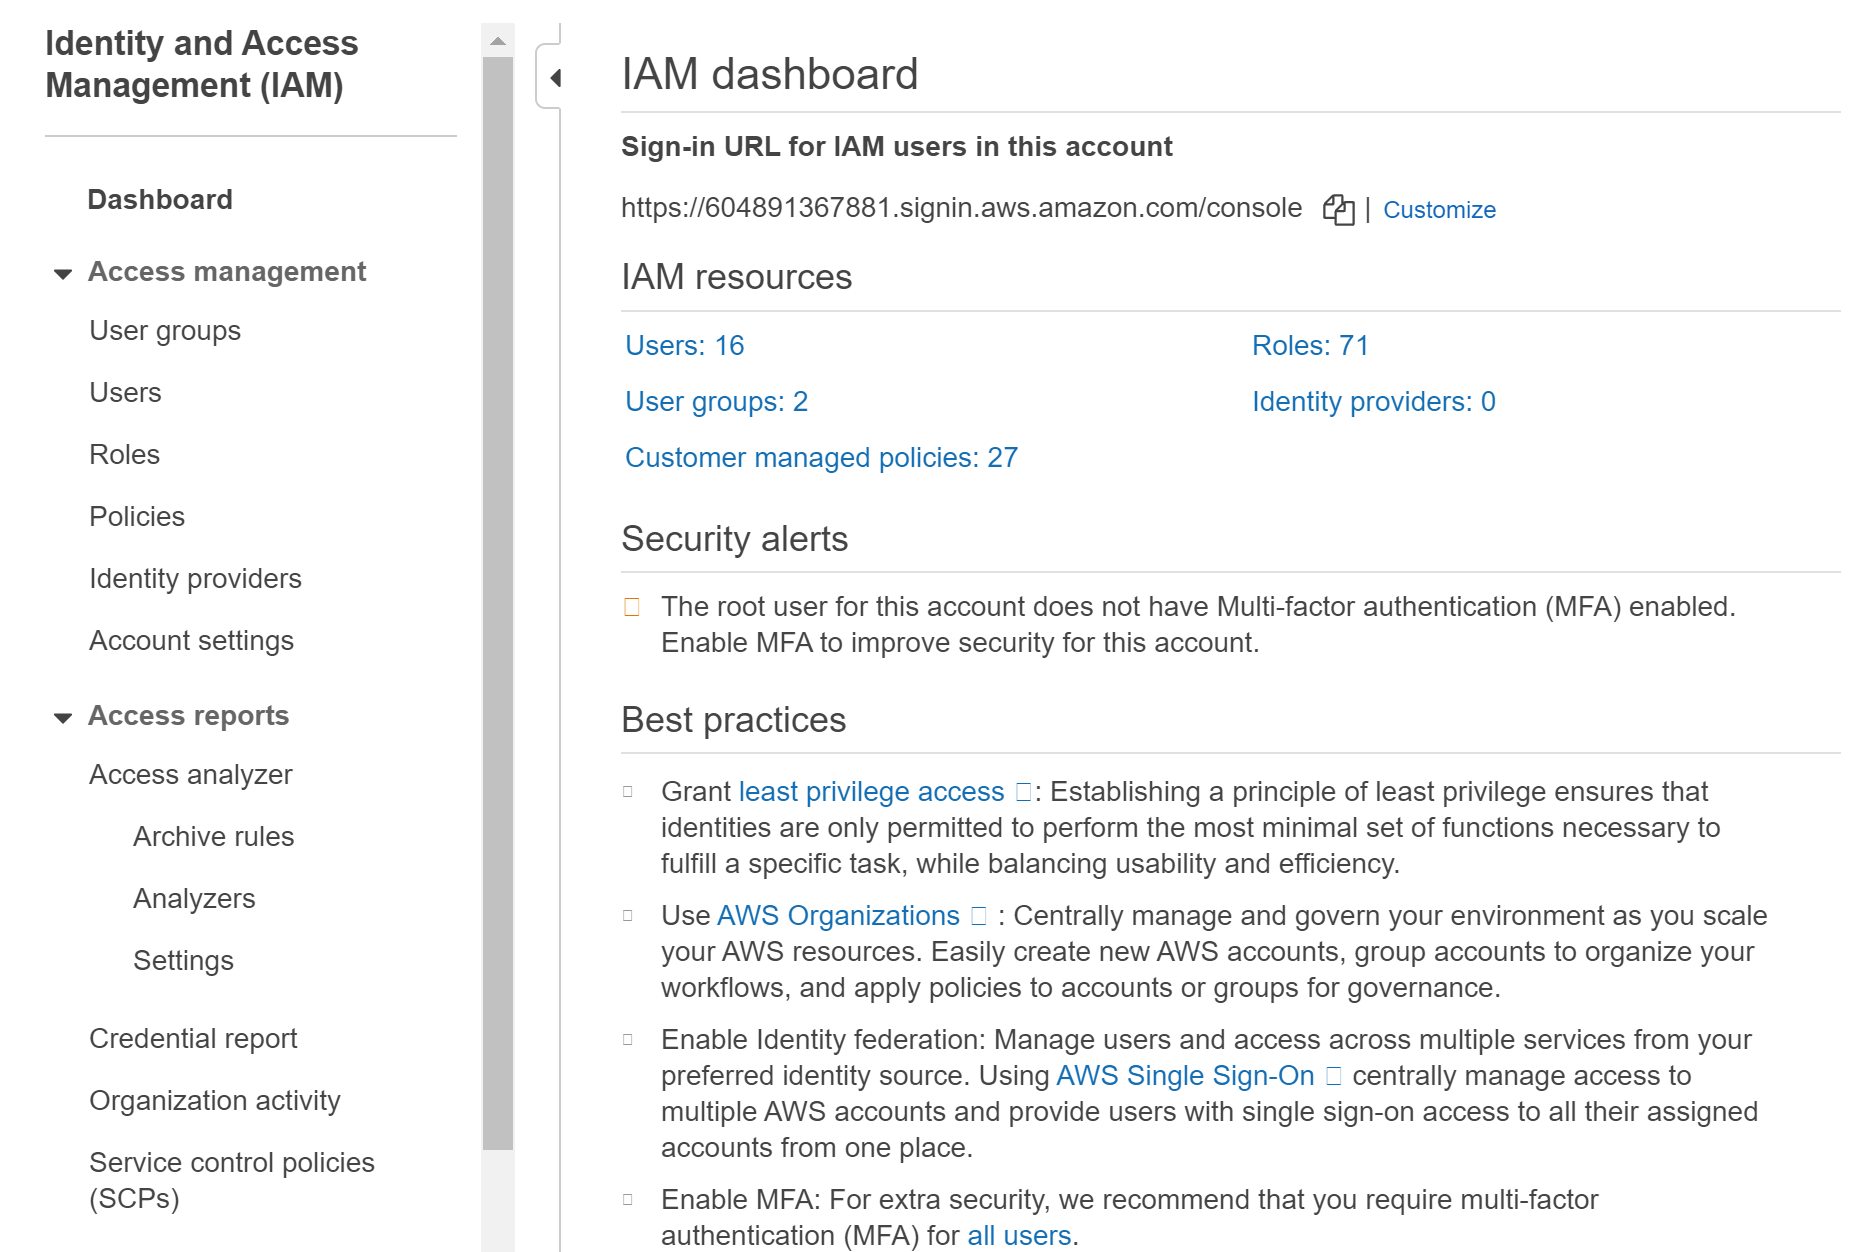
- Navigate to the “IAM” dashboard.
- https://console.aws.amazon.com/iamv2/
- Select “Credential Report” and download the report to monitor the accounts and the status of their credentials.
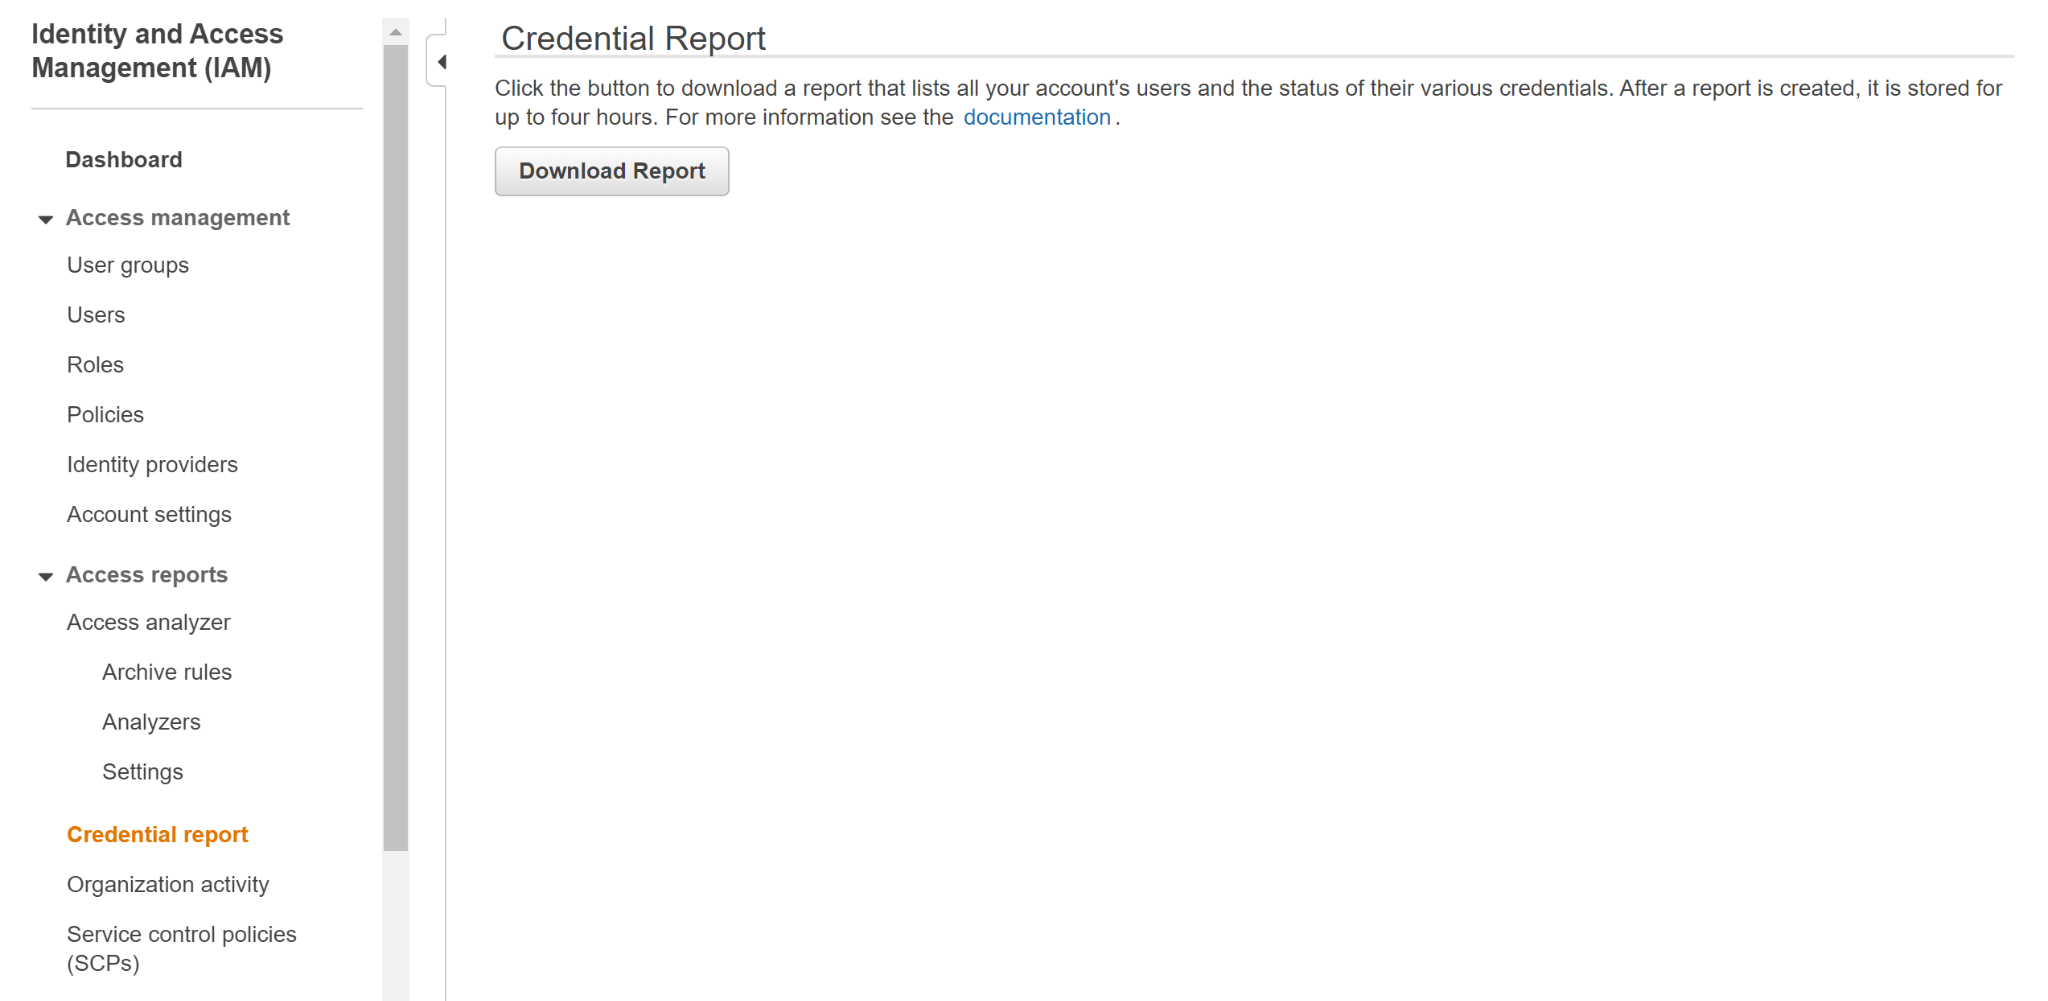
- In the downloaded report, check the timestamp value in the “password_last_used” column for the <root_account> user.If the timestamp value selected (i.e. the time at which root credentials have been last used) indicates a date that has been recorded in the previous 30 days, checked authentication credentials were used to get access to your root AWS account lately.
- Repeat the steps to check the credentials of other AWS root users.
Steps for remediation
- Sign-in to AWS management console.
- Navigate to the “IAM” dashboard. (https://console.aws.amazon.com/iamv2/ )
- Select “Users” in the left panel and click “Add new user” and fill the required fields in the “Set user details” section. Under Select AWS access type, check AWS Management Console access option and choose whether to use an auto-generated password or your own custom password from the Console password section. To require a password reset at the next sign-in, select Require password reset.
- To continue the process with the access permissions setup, click the “Next: Permissions” button.
- On the “Set permissions for <IAM_USER_NAME>” page, choose to Attach existing policies directly option and select the AmazonEC2FullAccess managed policy from the bottom panel.
- To continue the IAM user setup review, click Next: Review.
- Verify the IAM user configuration details on the Review page and once done, click Create user button to create your new AWS IAM user.
- Click Download .csv to save the file with the user password to a secure location on your machine. Click the Close link to return to the IAM Users page, once the file is downloaded.
- For the newly created user click on the IAM user name to access its configuration settings to enable Multi-Factor Authentication (MFA).
- Select the Security credentials tab and click the edit button next to the Assigned MFA device setting on the Summary page.
- Select A virtual MFA device and click Next Step in the Manage MFA Device dialog box.
- Now install the AWS MFA-compatible application. Click on “Next Step”
- Click Activate Virtual MFA to complete the setup procedure by scanning the QR code with the Google Authenticator program, and two consecutive authentication codes in Authentication Code 1 and Authentication Code 2 boxes. If successful, "the MFA device has successfully been linked." This message will appear. To leave the wizard, click Finish.
- To test the new IAM user with MFA, go back to your panel and choose Dashboard and copy your IAM user’s login link to the clipboard.
- Sign out from the AWS root account, enter a copied login URL into your browser address bar in the previous step, and check the new IAM user login information.