
Ensures that autoscale notifications are enabled for all Virtual Machine Scale Sets
Risk Level: Medium
Description
This plugin ensures that the Azure Virtual Machine (VM) scale sets have autoscale notifications enabled. Autoscale helps in automatically adding more resources while scaling up and deleting resources while scaling down. It lets specify a maximum and minimum number of instances to run based on a set of rules.
About the Service
Azure Virtual Machines:
Azure Virtual Machines (VM) are one of several forms of scalable, on-demand computing resources offered by Azure. VMs are typically used when you require more control over the computing environment than the other options provide. To know more, read here.
Impact
When the autoscaling notifications are disabled, you won't be able to know about the status of your autoscale operations. If the autoscaling is not running properly it could result in ineffective cost management.
Steps to Reproduce
Using Azure Console-
- Log In to your Azure Console.
- Navigate to the Home portal of the Azure Console and click on All services.
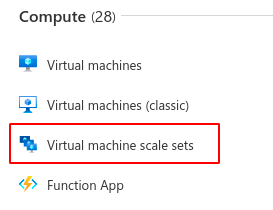
- Select Virtual machine scale sets under Compute to access all the virtual machine scale sets present in the directory. You can use this link here to navigate directly if you’re already logged in.
- In the list of Virtual Machine (VM) scale sets displayed, select a scale set you wish to investigate.
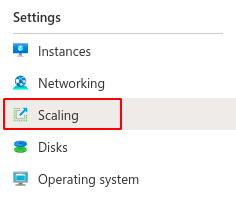
- From the navigation panel on the left side of the console, click on Scaling under the Settings section.
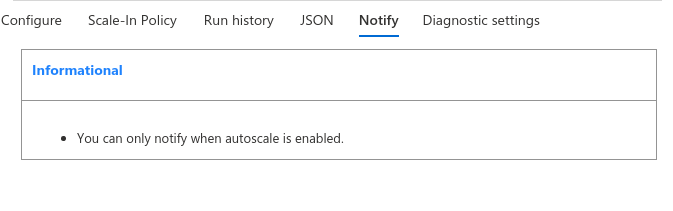
- On the Scaling configuration page, navigate to the Notify tab to access the notification settings.

- If it displays “you can only notify when autoscale is enabled”, it means that the selected scale set does not have autoscaling enabled.
If the notification settings are displayed but it isn't configured, then autoscale notifications are not enabled for the selected Azure virtual machine scale set. - Repeat steps 4 to 7 for all the scale sets you wish to investigate in the selected directory.
- If you have multiple directories, repeat steps 2 to 8 for each directory in your Azure Console.
Steps for Remediation
Follow the steps given below to make the necessary changes in order to enable autoscale notifications for all the Azure virtual machine scale sets.
Using GCP Console-
- Log In to your Azure Console.
- Navigate to the Home portal of the Azure Console and click on All services.
- Select Virtual machine scale sets under Compute to access all the virtual machine scale sets present in the directory. You can use this link here to navigate directly if you’re already logged in.
- From the list of scale sets, choose the VM scale set you want to reconfigure. (In case you aren’t sure which one needs to be configured, follow the steps to reproduce listed above to determine which scale set to choose.)
- From the navigation panel on the left side of the console, click on Scaling under the Settings section.
- On the Scaling configuration page, navigate to the Notify tab to access the notification settings.
- If you want to be notified via email, check the email administrators and email co-administrators checkboxes and add the desired emails in the text box provided.
If you wish to use webhooks to route autoscale notifications, enter a valid HTTP/HTTPS endpoint. Finally, click Save to save all the changes.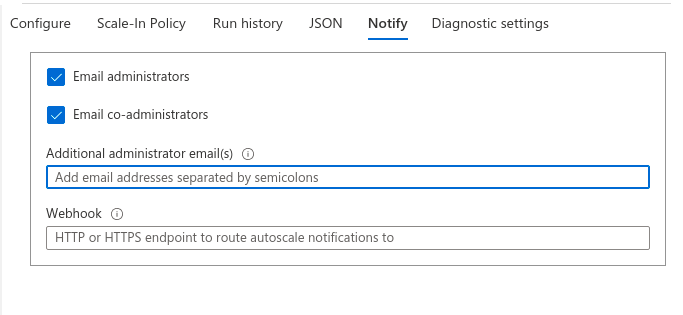
Note: In case autoscaling is disabled, follow the steps below to enable autoscaling before you turn on the autoscaling notifications.
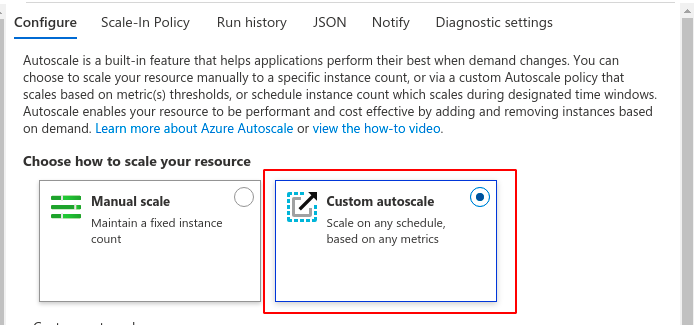
- Go to the Configure tab on the Scaling page and click on Custom autoscale under Choose how to scale your resource.
- Make the required changes to the configuration settings and click save to apply all the changes.
If you have multiple directories, repeat steps 2 to 7 for each directory in your Azure Console.