
Ensure that instances are not configured to use the default service account with full access to all cloud APIs.
Risk Level: High
Description
This plugin ensures that instances are not configured to use the default service account with full access to all cloud APIs. This violates the principle of least privilege. Thus, PingSafe strongly recommends that none of the GCP Compute Engine instances have the scope set to allow full access to all Cloud APIs
About the Service
Google Cloud Compute Engine:
Google Cloud Compute Engine is a service that allows you to create Virtual Machines based on your preferences and run them on Google’s infrastructure. You can either use their predefined machines with certain default configurations or create your own custom Virtual Machine to meet your exact requirements. To know more, read here.
Impact
If instances are configured to use the default service account with a scope of full access to all cloud APIs, it could result in privilege escalation. As a result, all users could be granted permission to perform various tasks that they are not meant to, eventually failing to follow the principle of least privilege. To know more about the principle of least privilege (POLP), read here.
Steps to Reproduce
Using GCP Console-
- Log In to your GCP Console.
- From the top navigation bar, select the GCP project you want to investigate.

- From the navigation panel on the left side of the console, go to Compute Engine and select VM Instances. You can use this link (https://console.cloud.google.com/compute) to navigate directly if you’re already logged in.
- Select the VM instance you want to investigate from the list of instances and go to the Details tab to examine the details of the VM instance selected.

- Scroll down to the Service Account section. The VM instance is configured to use the default Compute Engine service account if the ID matches the pattern <gcp-project-number>-compute@developer.gserviceaccount.com.
- In the Cloud API access scopes section, if the value is set to Allow full access to all Cloud APIs, the VM instance is configured to use the default Compute Engine service account and allows full access to all Google Cloud APIs.
- Repeat steps 4 to 6 for all the VM instances you want to investigate in the selected project.
- If you have multiple projects that you want to investigate, repeat steps 2 to 7 for each project in your GCP console.
Steps for Remediation
Determine whether or not you truly require the scope of the default service account to be set to full access to all cloud APIs. If not, follow the steps below to make the necessary changes.
Using GCP Console-
- Log In to your GCP Console.
- From the top navigation bar, select the GCP project you want to investigate.
- From the navigation panel on the left side of the console, go to IAM & Admin and select Service Accounts. You can use this link (https://console.cloud.google.com/iam-admin/serviceaccounts) to navigate directly if you’re already logged in.
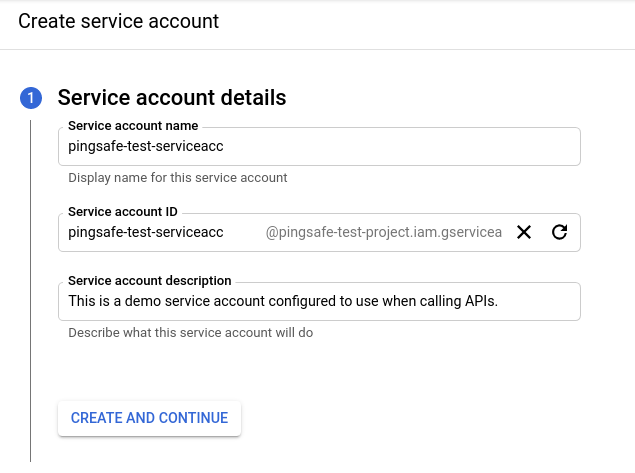
- Click the CREATE SERVICE ACCOUNT option to start creating your service account. In the Service account details section of the page, provide a service account name and a short description about what the service account is for in the Service account description text box. Then, click create and continue to proceed to the next sections.
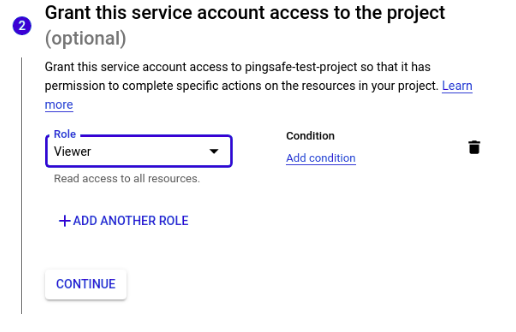
- In the Grant this service account access to the project (optional) section, grant access to the GCP project by adding the necessary roles, and then click continue.
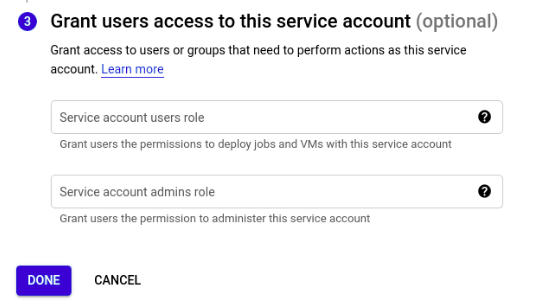
- In the Grant users access to this service account (optional) section, add the required users in the Service account users role textbox to grant only those specific users the permissions to deploy jobs and VMs with this service account. Similarly, add the required users in the Service account admins role textbox to grant them permission to administer this service account. Then click DONE to finish creating the service account.
- From the navigation panel on the left side of the console, go to Compute Engine and select VM Instances. You can use this link (https://console.cloud.google.com/compute) to navigate directly.
- Choose the virtual machine (VM) instance you want to change the settings for select the STOP button from the top navigation bar and confirm the action in the confirmation box.
- Now, click on the EDIT button on the top navigation bar to edit the required configurations of the VM instance.
- Scroll down to the Service account section and select the service account you just created from the drop-down list provided. Click Save to save the changes.
- Select the START button from the top navigation bar and confirm the action in the confirmation box. This VM instance is now successfully using the new GCP service account you created.
- Repeat steps 3 to 11 for all the VM instances you want to reconfigure in the selected project.
- If you have multiple projects, repeat steps 2 to 12 for each project in your GCP console.